I hope you like seeing the work areas of other creative people as much as I do, since our blog is going to feature eleven different ones this month (beginning with Judy's invitingly messy supply cupboards earlier this week). I know I learn about a writer's or illustrator's process from seeing where they create, and I often pick up ideas that help me with my own organization and habits. Having said that, you should probably be careful about what you pick up from me - it's as likely to be about how to create a gigantic mess as a masterpiece!
The photo above shows what has always been my favorite workspace: the kitchen table. (Shown with my book
Mimi in progress.) I do have a dedicated studio upstairs, which I use too (okay, especially for storage), but I think I've always just felt more comfortable working near my family and all the stuff I need to manage our busy lives. And near the refrigerator, as my hips will attest.
But this year, one of my major resolutions is to really and truly start working in my studio (shown above, in a rare tidy-ish state, though if you have more orderly habits, it might not seem that way to you). For one thing, working at the kitchen table has meant
constantly shifting things from the table to my studio whenever we've needed to do things like eat dinner. Or play mah-jongg. Or finish homework projects (because everyone else here seems to prefer working at the kitchen table too). For another, with two kids off at college and one studying marine conservation in the Seychelles off Africa (jealous, jealous, jealous), my nest will finally be empty this spring, so there's not really the need for me to hang out in Family Central anymore.
And finally, I'm grudgingly admitting a little more distance (and a flight of stairs) between me and the fridge might not be a bad idea.
I've spent a lot of the fall trying to get things arranged in my studio to make it both more inviting and better suited to my work. (Though I've resisted the urge to really renovate by stripping wallpaper, refinishing floors, adding skylights, painting - ah, a girl can dream.) What follows are a lot of photos with annotation. I hope there are ideas that might also work for other illustrators and/or writers.
My main work area for illustration is a large drawing table that I now have set up the way I usually arranged the kitchen table: with stations for different tasks.
This is the sewing station - for my mixed media, fabric-heavy art, it's a spot where I spend a lot of my time. It's not really set up exactly right in the photo. I usually have a small old-fashioned waxed paper bag taped to the edge to deposit cut threads and small scraps (the one orderly practice I actually acquired from my junior high sewing class). On the right, I also normally have a small coiled fabric basket that my collaborator and friend, Julie Stiegemeyer, made as a gift for me. It's perfect for holding my tiny sewn bits while they're in progress - the fabric (well, yarn, really) of the basket grabs the small items and keeps them from sliding off the table and getting lost. And see the reading glasses? I usually have a thousand of them scattered about.

Next to that is my cutting station. I mostly use an xacto knife for cutting paper and boards (and go through a LOT of blades). Normally I have an old tin I use to deposit used blades, as well as a box of new blades nearby. For fabric I use Fiskars sewing scissors or some of my vintage embroidery scissors. (I'm addicted to buying interesting scissors at estate sales.) The self-healing cutting mat I adore. Mine is made by Loew Corning and I got it at a local craft store, but there are lots of options available at reasonable prices online, like these at
amazon.
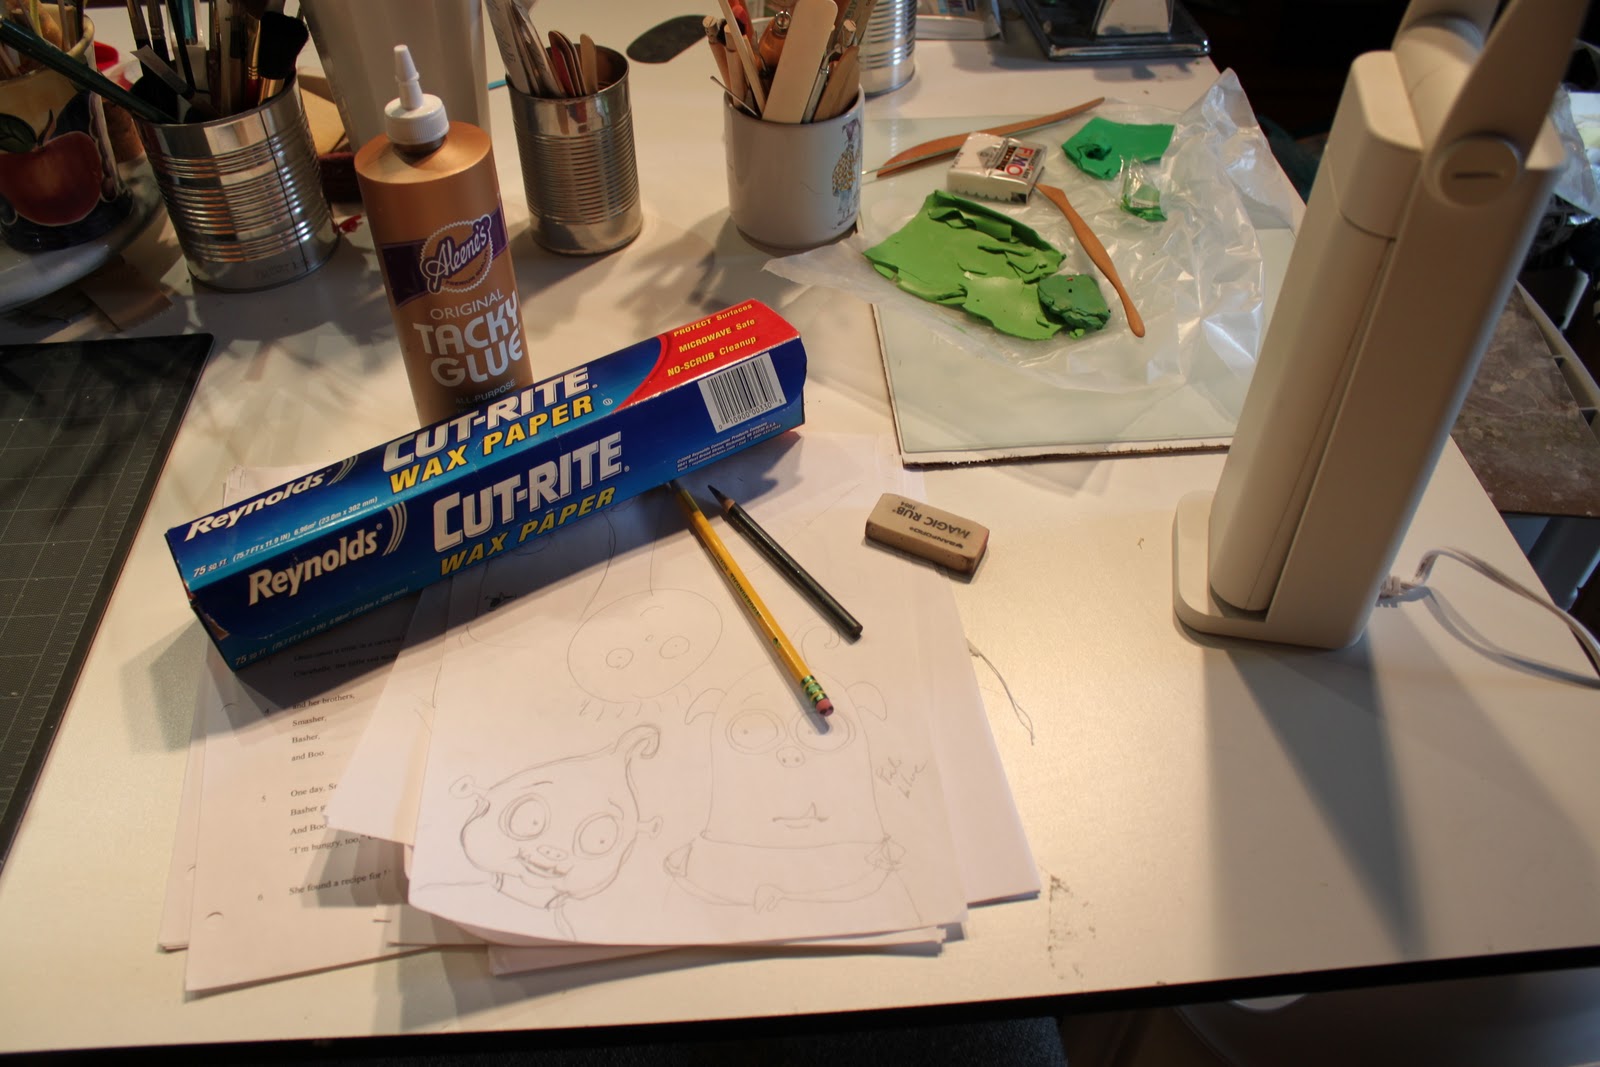
To the right of the cutting area is my drawing/gluing/painting station. I usually put a sheet of waxed paper down to protect the surface when I'm gluing stuff up - I've learned the hard way that glue ruins self-healing mats. I tend to use inexpensive materials for sketching - ordinary Ticonderoga pencils and printer paper - largely because using good things seems to paralyze me or at least make me tight when I'm sketching. For transfering images for cutting or moving onto my final boards I mostly use Ebony pencils on inexpensive tracing paper that I buy in rolls. I used to use expensive vellum tracing paper, but unless an image needs to be transferred multiple times, I find the cheap stuff is fine. The lamp on the right (an Ott-light knock off) is wonderful and gets shifted around to wherever I'm working. It provides a very bright, clear light. There is usually a huge pile of books and other visual references on the floor next to this station.

At the opposite end from the sewing station is my polymer clay station. I keep them as separated as possible, since fabric fibers ruin the clay, and clay can ruin the fabric. Ideally, I'd do these tasks in different rooms. The pasta maker on the right is great for conditioning and mixing clay, as well as for rolling it flat when I need uniform sheets. The cup holds a ton of tools for shaping the clay - some intended for that purpose and others that are makeshift, like small knitting needles. The green clay in the photo is on waxed paper, but I normally work on the heavy piece of glass under it.
The remaining side of the table is multipurpose. I often use it when I'm working standing up (I don't have a chair along that side). Or if I need more room at a station, I push all the supplies in the middle over to this open area.
The rest of my studio is largely devoted to storage of one sort or another. Mixed media art demands an ungodly number of supplies.

I made the white trays above from foamcore - there's a tray for each of the 32 pages in a picture book, as well as the covers. I use them to hold all the bits and pieces of each illustration while they're in progress. I tried several other systems, including boxes (took up too much space) and envelopes (stuff got squashed). I got this idea from a kindergarten class where each child had a "work-in-progress" tray. Now I just need some shelves to make access easier.
Muffin tins and vintage dessert cups are great for sorting small things, and it's easy to remove and replace a whole group of things when I'm working.
I use canning jars to store other small items (pretty as well as functional). I recently bought more to sort pre-mixed clays by color, but I store them in a cupboard to protect them from light.
I love little drawers. The chest is from IKEA (years ago) and the tool sorters from Home Depot. The vase for storing chenille stems was a thrift store find. The pink crate below that sorts paints by color and glues by type was a garbage rescue.
An important part of my resolution this year is stop working a half hour before knock-off time (usually around five-thirty or six, so I can start dinner before I go on my exercise walk) - and CLEAN UP, so that the stations are once again visible and usable.
I tend to write either at the kitchen desktop computer or increasingly on my newish iPad, shown here on the desk my husband made for our bedroom. I got a wireless keyboard to make word processing easier, and I use the Documents-to-Go app in conjuction with Mobile Me to work on manuscripts.
The binder on the left of the desk is for an adult novel I'm working on. My writing buddy Julie Stiegemeyer showed me how to set them up for every book I do. Now I don't know how I got by without that system.
Here's the binder for my apple pie book - it has neat tabs for all the different things I stored in it, like notes for specific pages, the dummy, my tracing paper patterns ready to transfer to boards or fabrics.
This is the binder for the book I'm working on now. No neat tabs - but still a huge help to corral all the bits and pieces in one place. And I've kind of color-coded the binder to make it easy to spot - it's for a book about a red monster.
Finally, this is the "studio" where I get much of my inspiration and work through issues that are giving me headaches.
I'd love to hear if these ideas work for anyone else - or if you have more good ideas for me!


 I made the white trays above from foamcore - there's a tray for each of the 32 pages in a picture book, as well as the covers. I use them to hold all the bits and pieces of each illustration while they're in progress. I tried several other systems, including boxes (took up too much space) and envelopes (stuff got squashed). I got this idea from a kindergarten class where each child had a "work-in-progress" tray. Now I just need some shelves to make access easier.


Wow Carol. Very cool space. I love the muffin tins and canning jars (and if I were an artist, the foam core trays). I'm a mess-aholic, so your space looks quite neat to me.
ReplyDeleteI got a Mah-jong set for Christmas, so you'll have to teach me how to play.
I like the binder idea. I have bins for each project.
ReplyDeleteThis reminds me of my father's workshop (the manly name for a workstation). He had small containers and glass jars set aside for screws and nuts and bolts.
ReplyDelete